 ×
×
Maintaining a UV laser marking machine properly is one of the most critical factors in achieving consistent, high-quality output over the long term. Unlike fiber or CO2 systems, UV laser technology operates at shorter wavelengths and lower heat output, which makes it exceptionally precise — but also sensitive to environmental conditions, contamination, and component wear. Whether you are marking plastics, glass, ceramics, or sensitive electronic components, your machine's performance depends heavily on how well you follow a structured maintenance routine. Understanding what that routine looks like and why each step matters is the foundation of reliable production.
A well-maintained UV laser marking machine not only delivers sharper, more legible marks but also reduces the risk of costly downtime and premature component failure. Many operators underestimate how quickly dust accumulation, optical misalignment, or coolant degradation can affect marking precision. This guide walks through a practical, step-by-step maintenance framework — covering daily habits, periodic inspections, optical care, cooling system management, and software calibration — so you can keep your equipment performing at peak capacity throughout its operational life.
The output quality of a UV laser marking machine is intimately tied to the cleanliness of its optical path. The UV wavelength — typically 355 nm — is extremely sensitive to particulate contamination on lenses, mirrors, and beam delivery components. Even a thin layer of airborne dust or residue from the marking process can scatter or absorb portions of the beam, resulting in inconsistent mark depth, blurred edges, or uneven energy distribution across the focal spot.
When contamination builds up on the focusing lens or field lens, the machine may still appear to be functioning, but output quality degrades gradually. Operators often notice this as increasing difficulty achieving fine detail on intricate designs, or as variations in mark contrast between batches. Establishing a cleaning schedule before these symptoms appear is far more effective than responding after quality has already declined.
It is also important to understand that the UV laser source itself generates very little heat compared to other laser types, but the optics are still vulnerable to thermal stress if contamination causes localized absorption. This is why cleanliness is not just about aesthetics — it directly protects the longevity of your most expensive components.
A UV laser marking machine relies on precise mechanical alignment between the laser source, beam expander, galvanometer scanner, and focusing lens. Over time, vibration from operation, temperature cycling during production shifts, and general mechanical wear can introduce micro-level misalignments that compound into visible quality issues. Marks may start to appear slightly off-center, asymmetrical, or with inconsistent focus across the marking field.
Thermal drift is a related concern, particularly in environments where ambient temperature fluctuates significantly throughout the day. As components expand and contract with temperature changes, the beam path can shift in subtle ways that are difficult to detect without structured testing. Scheduling regular alignment verification checks — especially after extended production runs or seasonal temperature changes — is an essential part of maintaining consistent output quality.
Operators who understand these mechanical principles are better equipped to interpret early warning signs and act before small deviations become significant defects. A UV laser marking machine that is checked regularly for alignment will hold its calibration longer and require fewer emergency corrections.
Every production day should begin with a brief but disciplined inspection routine. Before powering on the UV laser marking machine, visually check the work area and the machine enclosure for signs of dust buildup, debris from previous marking sessions, or any abnormal residue near the lens area. Use a clean, lint-free cloth or pressurized air (filtered and dry) to clear loose particles from the exterior housing and any accessible surfaces near the beam path.
The protective window — the glass or quartz cover that shields the focusing lens from fume and particle exposure — is a consumable component that requires daily attention. Inspect it at the start and end of every shift. If you notice hazing, pitting, or surface residue, replace or clean it immediately. Marking through a compromised protective window will degrade output quality and may allow contaminants to reach the focusing lens underneath, causing far more expensive damage.
Check all cable connections, cooling hoses, and mounting fixtures for signs of loosening or wear. Vibration during operation can gradually loosen fasteners, particularly on the galvanometer assembly and the marking head bracket. Tightening these connections as part of a daily visual routine takes only minutes but prevents alignment drift over time.
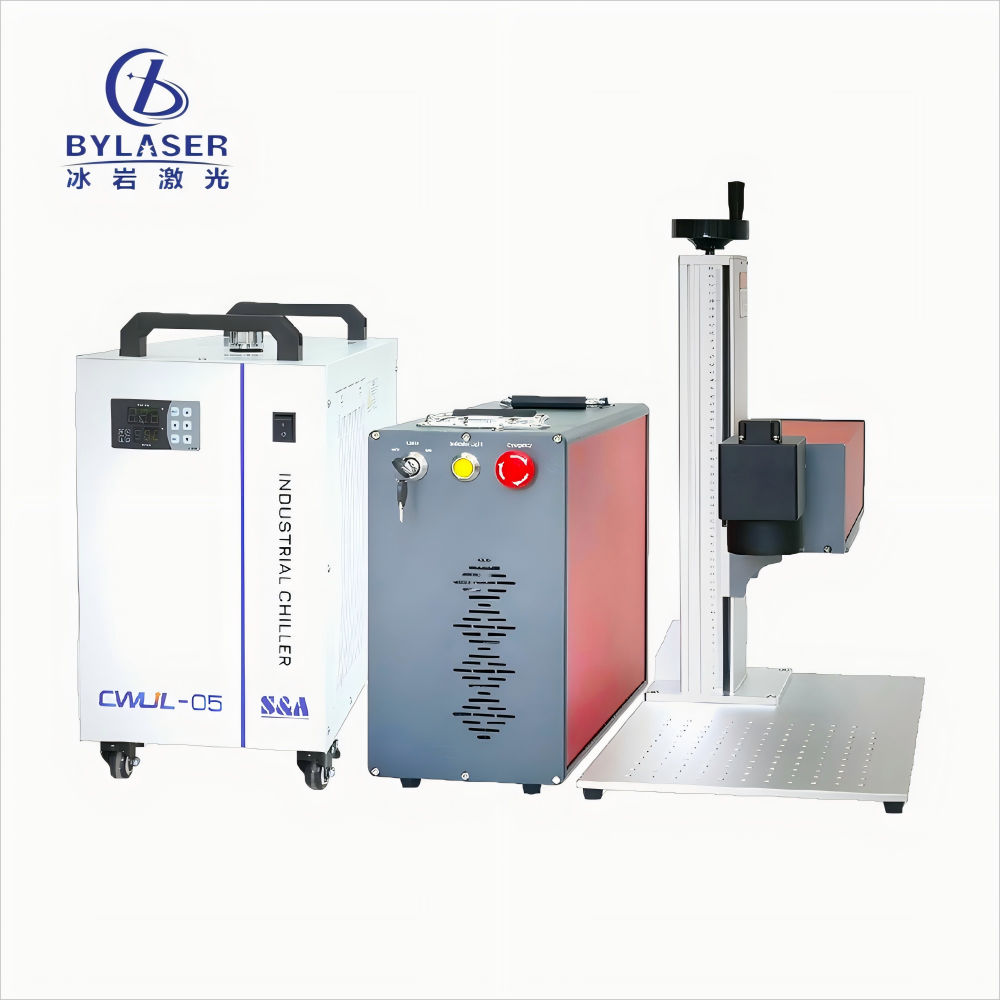
The cooling system of a UV laser marking machine — whether water-cooled or thermoelectric — plays a direct role in maintaining stable laser output. For water-cooled systems, check the coolant level weekly and inspect the water lines for any signs of mineral deposit buildup, discoloration, or micro-leaks. Using deionized or distilled water mixed with the manufacturer-recommended antialgae additive prevents biological growth inside the cooling circuit, which can restrict flow and cause thermal regulation failures.
Coolant temperature stability is critical because UV laser diode pump sources and crystals operate within tight thermal tolerances. If the chiller is unable to maintain the set temperature — due to dirty filters, low fluid levels, or a failing pump — the laser output power will fluctuate, directly translating to inconsistent marking depth and contrast. Verify chiller temperature setpoints and actual readings weekly to catch developing issues early.
Also check the power supply unit for any indicator lights or error codes, and inspect the electrical cabinet for unusual heat buildup or signs of component stress. A UV laser marking machine operating under stable electrical conditions maintains more consistent pulse energy, which is foundational to repeatable mark quality.
Cleaning the optical components of a UV laser marking machine requires more care than most other industrial equipment maintenance tasks. UV-grade optics are coated with specialized anti-reflection and high-damage-threshold coatings that can be permanently damaged by inappropriate cleaning agents or abrasive materials. Always use optical-grade lens tissue or cotton swabs, combined with pure isopropyl alcohol (99%+ purity) or acetone, applied with very light pressure using a single-pass technique.
Never wipe a contaminated lens back and forth, as this spreads particles and risks scratching the coating. Instead, use a single gentle stroke from the center outward, then discard the tissue and use a fresh one for any subsequent passes. For mirrors in the beam path, the same gentle approach applies. If you notice coating damage, pitting, or persistent haze that does not respond to cleaning, the component should be scheduled for replacement rather than continued use.
The focusing lens typically has the shortest service life among optical components because it is closest to the workpiece and most exposed to processing fumes. Monitor its condition closely and treat its replacement as a scheduled consumable cost rather than a reactive repair. Proactive optical maintenance keeps the UV laser marking machine delivering sharp, consistent results without unexpected interruptions.
The galvanometer scanning mirrors are responsible for directing the laser beam across the marking field with high speed and precision. These components are among the most mechanically active parts of a UV laser marking machine and require periodic inspection for mirror surface quality, motor bearing condition, and electronic drive performance. Any signs of scoring, hazing, or physical damage on the scanner mirrors should be addressed promptly, as imperfect reflection directly degrades mark edge quality.
Field calibration of the galvanometer system should be performed according to the manufacturer's recommended interval — typically every three to six months under normal production conditions, or more frequently in high-throughput environments. Calibration involves running a test grid pattern on a reference substrate and adjusting the scanner correction file to ensure accurate spatial positioning across the full marking field. Neglecting this step leads to geometric distortion that becomes increasingly apparent on precision marking tasks.
Keeping a calibration log with dated test results allows you to track scanner performance trends over time and predict when recalibration or component replacement will be needed. This data-driven approach turns galvanometer maintenance from a reactive task into a planned, quality-supporting activity that directly extends the productive life of the UV laser marking machine.
Hardware maintenance alone is not sufficient to guarantee consistent quality from a UV laser marking machine. The software layer — including marking parameters such as laser power, frequency, scan speed, pulse width, and focus offset — must also be carefully managed. Parameter drift, caused by accidental changes, software updates, or operator variation, is one of the most common sources of unexplained quality inconsistency in production environments.
Establish a locked parameter library for each material type and marking application you run regularly. Whenever a new job is set up, operators should load from validated parameter sets rather than entering values manually. This eliminates human input error and ensures that every production run begins from a known-good baseline. Document and version-control your parameter files just as you would any other critical production document.
Periodically run verification marks on sample materials using your standard parameters and compare them against an archived reference sample. If contrast, depth, or edge quality has shifted despite consistent machine settings, this is a strong indicator that a physical component — typically the protective window, focusing lens, or cooling system — needs attention. Combining software discipline with hardware maintenance creates a closed-loop quality control system for the UV laser marking machine.
Building a formal preventive maintenance schedule is the single most effective organizational step you can take to protect the long-term performance of a UV laser marking machine. The schedule should define intervals for each maintenance task — daily, weekly, monthly, quarterly, and annually — and assign responsibility to specific personnel. Without a documented schedule, maintenance tasks tend to be deferred under production pressure until problems become unavoidable.
Maintain a machine log that records all maintenance actions, component replacements, calibration results, and any observed anomalies. This log becomes an invaluable diagnostic resource when troubleshooting quality issues, and it provides concrete data to support warranty claims or service requests. It also enables you to calculate the actual cost of consumables and maintenance over time, supporting informed decisions about component stocking and budget planning.
For operations running the machine in high-throughput or continuous-shift environments, consider partnering with a qualified service provider for annual or biannual deep inspections. These inspections typically cover internal beam path alignment verification, laser crystal health assessment, power output measurement against factory specifications, and chiller system servicing. A UV laser marking machine that receives this level of systematic care will consistently deliver the precision and repeatability that demanding marking applications require.
The focusing lens should be inspected at the start of each shift and cleaned whenever visible contamination is present. In high-throughput or fume-intensive applications, daily cleaning may be necessary. Replace the protective window above the lens more frequently, as it is the first line of defense and is designed to be a consumable component. Regular attention to the lens prevents gradual quality degradation that can be difficult to detect until it becomes a serious production issue.
Deionized or distilled water mixed with the manufacturer's recommended antialgae or antifreeze additive is the standard recommendation for water-cooled UV laser marking machines. Tap water contains minerals and biological agents that deposit inside cooling channels and on laser components over time, restricting flow and causing thermal instability. Changing the coolant completely every three to six months is advisable, and the coolant lines should be flushed to remove any accumulated deposits during the change.
Common signs that recalibration is needed include geometric distortion in marked patterns, marks that are consistently off-center or asymmetrical, uneven mark depth across the marking field, and visible focus inconsistency between different areas of the work area. These symptoms point to galvanometer scanner drift or beam path misalignment. Running a calibration test grid and comparing it to a reference output is the most reliable diagnostic method to confirm whether recalibration is required.
Operating a UV laser marking machine with a cloudy or hazy protective window is not recommended. Even partial contamination on this component scatters and absorbs the beam, reducing effective power at the work surface and creating inconsistent marking results. More importantly, a compromised protective window allows processing fumes and particles to reach the focusing lens, which is far more expensive to replace. Protective windows are low-cost consumables and should be replaced at the first sign of irreversible contamination rather than used until failure.